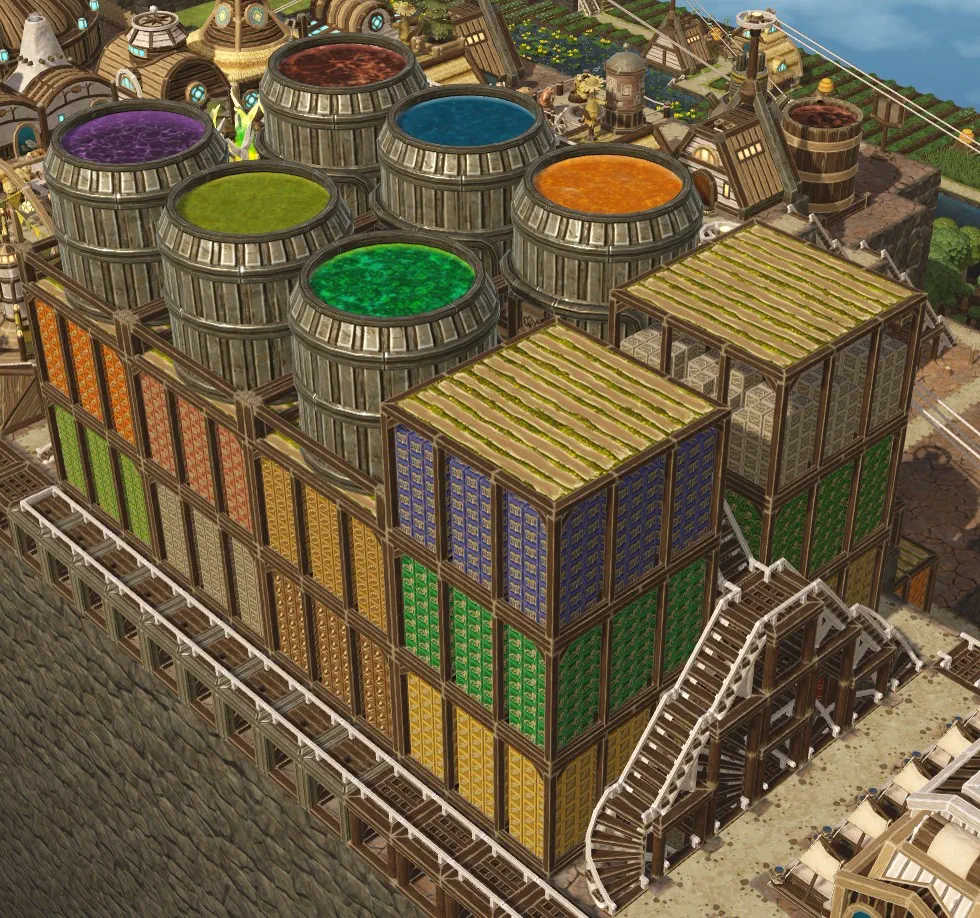
Timberborn Efficient 3-Story Warehouse With Basement
A Timberborn efficient multi-story warehouse with basement is best built as a central storage core: underground piles in the basement, large warehouses on the ground and first floors, and large tanks or more storage on the roof. The layout below keeps the center path connected, supports door access on every level, and leaves room for overhangs where underground piles need them.
The build is designed around 6 underground piles, 20 large warehouses, and 6 large water tanks. That makes it a strong all-purpose storage center for a manufacturing district without wasting space on awkward access paths.
Plan Your Floors
Before placing anything, decide the full stack of floors you want. The standard layout here uses:
- Basement: 2 large warehouses + 6 underground piles
- Ground Floor: 8 large warehouses
- Floor 1: 8 large warehouses
- Floor 2 / Roof: 2 large warehouses + 6 large tanks
That gives you a compact center with enough storage to handle most late-game logistics. The key limitation is the basement: underground piles can only go there, and each one needs extra overhang space planned in advance.

Note: one small difference from the image is that you may see 1x platforms in the middle of the stairwells, while this layout uses 2x platforms there. Follow the platform rules below rather than relying on the image alone.
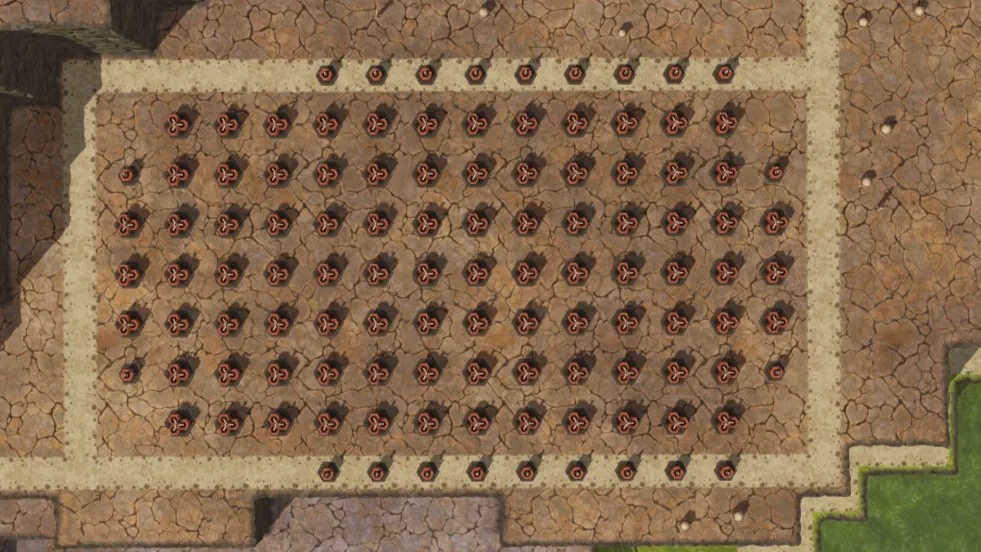
Create the Basement
Start by carving out the basement so the center corridor, building space, and stair access all fit cleanly. For each underground pile, leave additional depth for overhangs before you begin construction.
From ground level:
- Create a 12 x 7 grid of dynamite at 2-depth.
- On each far edge, add an extra 1 x 3 section centered at 2-depth.
- Place single-depth dynamite at the upper and lower ends of that added section.
- For each planned underground pile, add another 3-tile dynamite line at 1-depth on the outer edge where the pile will sit.
Once placed, the blasting pattern should match the intended basement footprint.
Explode the dynamite, then start shaping the interior.
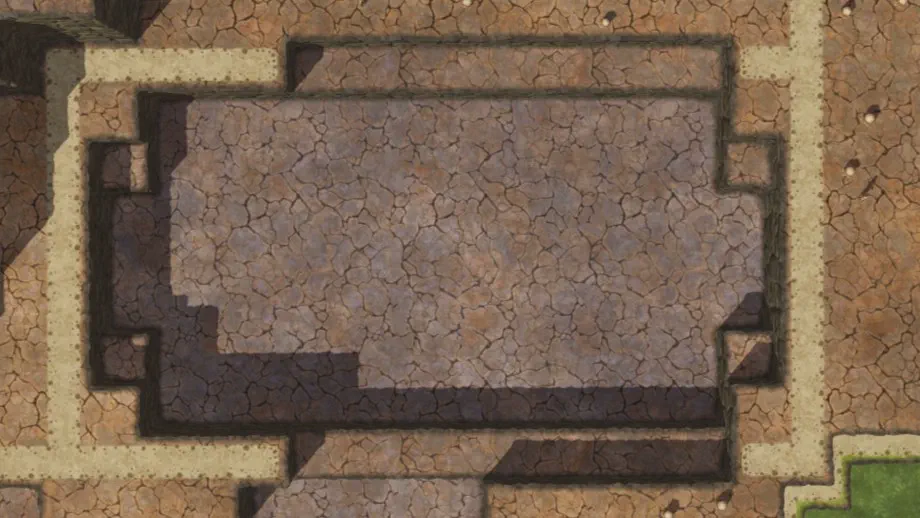
- Path the center line from one edge to the other.
- At each end of the inner pathway, place straight stairwells facing north and south of the path.
- On each stairwell, add a curved stairwell that connects the stairwell to the outside.
When finished, the basement should have a clean central route with access on both ends.
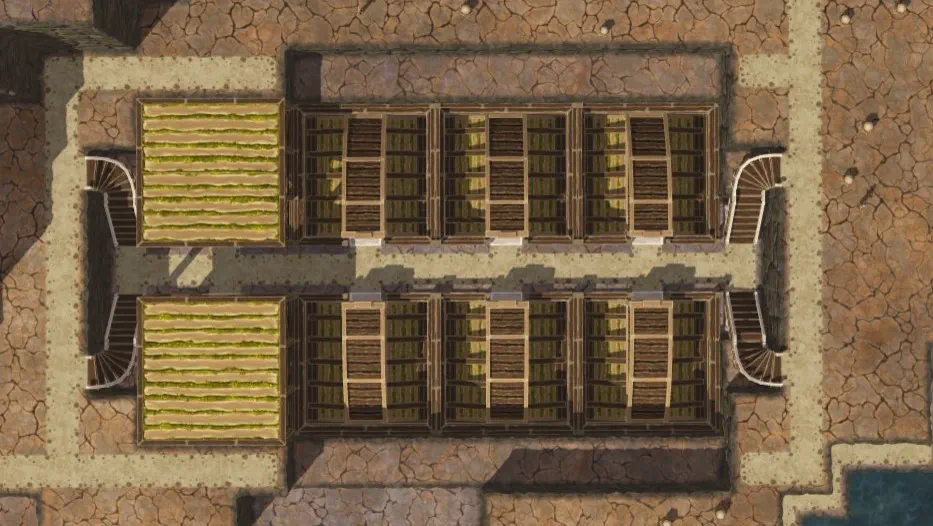
Ground Floor
The ground floor is simpler than the basement. It does not need stairwells of its own, but it does need platforms so the warehouse doors remain reachable. If you want, you can also face doors outward and reduce the platform work, but the layout below keeps everything centered.
Build the ground floor like this:
- Place double platforms above the central path.
- Add one more double platform over the straight stairways.
- Above each underground pile, place 3 x 4x1 overhangs.
- Path the center line from edge to edge.
That gives you the base structure for the ground-level warehouses.
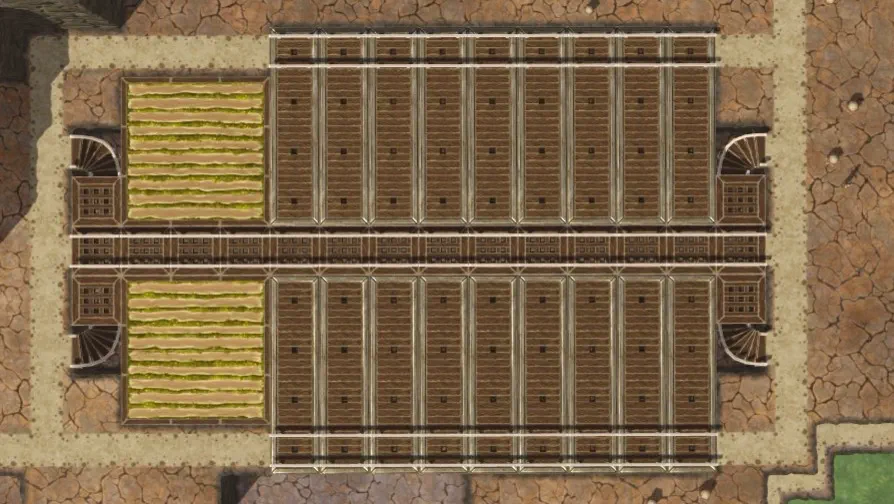
Now place the buildings:
- Fill the ground floor with large warehouses.
- Keep the doors oriented so the upper levels can connect cleanly.
- If you are not planning to build up, these slots can instead be used for large water tanks.

First Floor
The first floor is where the stair layout becomes more demanding. The goal is to continue the center path, align access points, and leave the roof level ready for the final storage layer.
Build it in this order:
- Place large warehouses on top of each ground-floor warehouse, with the doors facing inward.
- From each warehouse doorway, place 2x high pillars. This makes 10 total 2x pillars.
- Place 1x high pillars in the remaining two positions on each side of the central corridor.
- Add curved stairwells from the street level up to the 1x high pillar.
- Add 2x straight stairwells at each end of the 2x high pillars.
- Path all pillars so every route connects.
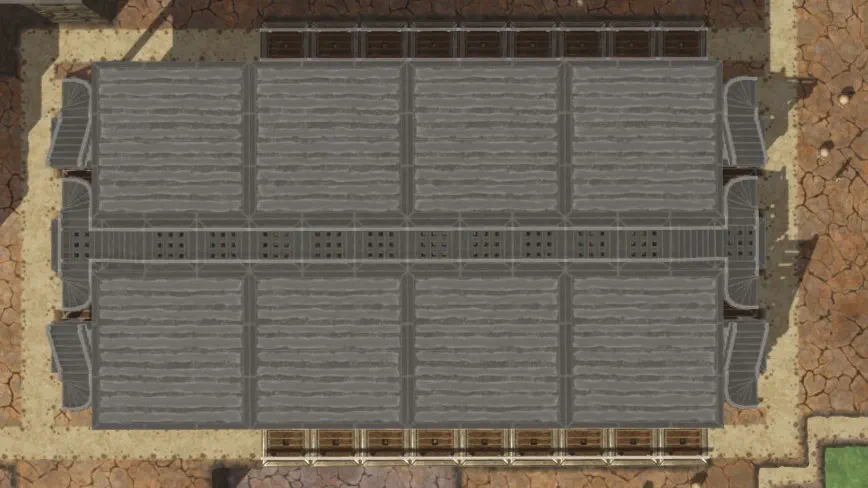
At this stage, the build also begins the next level:
- Place 1x high pillars at the inner corners.
- Add curved stairwells at every corner facing those pillars.
- Place straight stairwells on the pillars from the curved stairwell back toward the center.
That setup prepares the transition to the roof and keeps the stair network continuous.
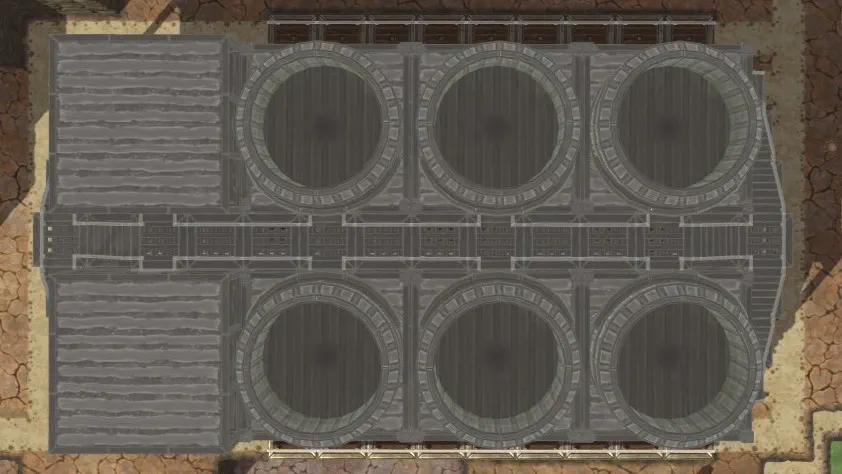
Second Floor and Roof
The top level can be used for either additional storage or fluid handling. If you want full fluid coverage, use 6 large tanks here.
Build the roof layer like this:
- Place 2x high platforms on every platform and stairwell across the center.
- Add straight stairwells from those new platforms to the stairwells placed at the end of the first floor.
- Place straight stairwells at the end of the highest 2x platforms.
- Path every exposed platform that does not already have stair access.
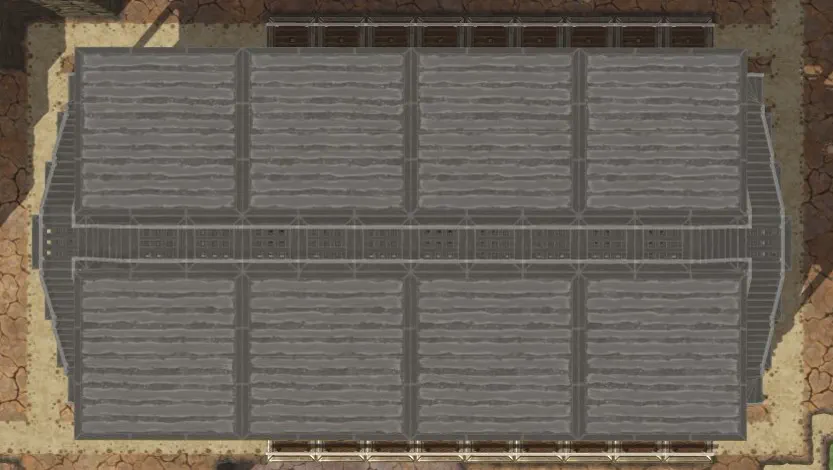
Once the paths are connected, place the final buildings:
- Large water tanks if the roof is meant for fluid storage.
- Or large warehouses facing the center path if you want more dry storage instead.
Scaling the Layout for a Larger Manufacturing District
This center design scales well as long as the same geometry rules stay intact:
- Keep the basement footprint large enough for each underground pile and its overhang.
- Extend the center corridor before adding side modules.
- Preserve the stair connection pattern so the upper floors remain reachable.
- Add more storage by repeating the warehouse blocks outward, not by breaking the central access line.
If the stair path fails, the usual cause is simple: a door is facing the wrong way, a platform is one tile off, or the stairwell is not aligned to the pillar height it is meant to connect to.