
The skull horde the many: the swarm supreme build guide is simple at its core: stack dodge, crit, and respawn speed first, then let damage-over-time and crowd control do the actual killing. The build works because The Many does not win by trading raw stats. It wins by surviving through evasion, turning frequent hits into procs, and recycling cheap units fast enough to keep the battlefield flooded.
The practical priority is straightforward: secure the core scaling items early, avoid trap stats like flat health and armor, and use every death as part of the economy. Once the engine is running, the swarm becomes hard to hit, hard to pin down, and constantly generating value.
How the setup works
The Many is strongest when you stop thinking about individual units and start thinking in systems:
- Dodge keeps the swarm alive by making attacks miss instead of trying to out-tank them.
- Crit turns each hit into a status application so the swarm can scale through Burn, Plague, Rot, and control effects.
- Respawn speed keeps the board full so losses are temporary and often profitable.
- Economy items turn unit deaths into resources, which lets the build snowball into better scaling pieces.
That is why the best version of the build leans hard into:
- Dodge scaling
- Crit scaling
- Fast respawns
- Luck and rerolls
- Status effects that trigger on crit or on hit
The build is not trying to make low-tier units durable in the normal sense. It is trying to make them difficult to remove, quick to replace, and valuable even when they die.
Recommended layout
Start with the foundation items
These are the first pieces that make the build function:
Dancer’s Shoes
Increases a unit’s total dodge chance by multiplying its base dodge and flat bonuses by +0.05%.
Why it comes first: this is the core survival stat for The Many. If units are hard to hit, they stay on the field long enough for the rest of the build to matter.
Whetstone
Increases a unit’s total crit chance by multiplying its base crit and flat bonuses by +0.05%.
Why it comes first: this is the start of your offensive engine. Crit is what turns the swarm from harmless chip damage into a consistent status-proc machine.
Hourglass
Increases the multiplier for squad unit respawn speed by +0.03% per stack.
Why it comes first: The Many needs bodies on the field at all times. Faster respawns keep the swarm stable after wipes and bad trades.
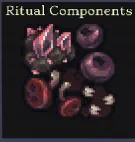
Ritual Components
Increases the speed at which your active ability becomes available after use.
Why it comes first: this is your emergency reset. If the board collapses, a faster active is often the difference between recovering and losing the run.
Lock in economy and reroll support early
Four Leaf Clover
Luck +1. Increases item and unit drop rate and rarity.
Why it matters: better drops accelerate your core setup and improve the odds of finding the right scaling pieces.
Pair of Dice
Increases the number of free rerolls for shops and gifts.
Why it matters: this build is picky. Free rerolls help you find the right dodge, crit, and respawn items without wasting Ducats on bad offers.
Build the crit engine
The goal here is not raw damage. It is reliable status application.
Use these together:
Whetstone
The base crit enabler.
Poise
+20% Crit Scaling / -4% Damage
This is one of the best tradeoffs in the build. The damage penalty is minor because the swarm’s real damage comes from crit-triggered effects and damage-over-time stacking.
Hand Wraps
+10% Crit Scaling / -3% Attack Rate
The attack-rate penalty looks awkward on paper, but The Many compensates with volume. More units still means more hits, more crits, and more proc uptime.
The logic is simple: 50 units landing weak hits with high crit consistency is better than 50 units chasing big base damage with low crit rate. The latter looks cleaner on the character sheet, but it does not kill bosses as reliably.
Stack dodge until enemy attacks stop mattering
This is the defensive core of the build.
Crouch
+20% Dodge Scaling / -5% Damage Multiplier
A major dodge modifier with a damage penalty that is easy to ignore. The Many does not need to lean on direct damage to win.
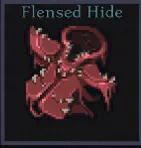
Flensed Hide
+10% Dodge Scaling / -10% Armor Multiplier
Armor is not worth chasing here. A bigger dodge number matters far more than a little extra mitigation on units that are already fragile.
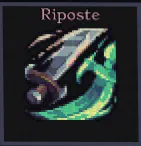
Riposte
When a unit dodges an attack, the damage is reflected back to the attacker.
This is what turns evasion into pressure. Against bosses and elites with heavy attacks, the swarm stops being passive defense and starts punishing enemies for trying to clear it.
Why Armor and Health are poor investments here:
- Low-tier units still get deleted quickly in late fights, even with added bulk.
- Dodge scaling reduces how often the damage lands at all.
- The build gets more value from surviving through misses than from slightly larger health bars.
Add the core damage-over-time package
This is the part that actually melts tougher enemies.
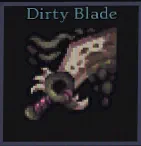
Dirty Blade
On crit, applies Plague stacks. Each stack deals 0.25% of max health as damage per tick, and the plague spreads to two nearby units on each tick.
This is your boss killer. Max-health damage keeps scaling into high-HP targets instead of falling off.
Glowing Brand
On crit, applies Burn stacks. Each stack deals 5 damage every second.
This handles smaller enemies and adds steady pressure across the whole fight.
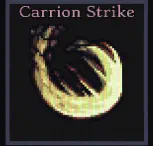
Carrion Strike
Friendly units apply Rot on hit to enemies that are not already afflicted. Rot adds a stack every second, and at 100 stacks the unit dies instantly.
This is the execution layer. It gives every contact with the swarm a death timer.
Keep enemies locked in place
Stunning Blow
On crit, applies Rooted and Disarmed.
- Rooted prevents movement while at least one stack remains.
- Disarmed prevents attacking while at least one stack remains.
This is especially strong for The Many because the swarm naturally stacks crit effects in huge volume. The result is battlefield control, not just damage.
Why it matters:
- Rooted keeps bosses and elites in your kill zone.
- Disarmed protects fragile units from retaliation.
- Both effects support the plague and rot package by keeping enemies stuck in place.
Prefer Broken Clock over Clock
There are two time-manipulation items, but only one fits this build cleanly.
The Clock
Respawn Time +0.5 / Respawn Rate Multiplier -17.5%
Avoid it. The flat increase is too punishing for already fast-respawning low-tier units.
Broken Clock
Respawn Time -0.75 / Respawn Rate Multiplier -2.5%
This is the better choice. The flat respawn reduction is extremely strong for The Many, and the small multiplier penalty is easy to absorb.
Add control and reinforcement multipliers
These pieces fine-tune the swarm once the core is online.
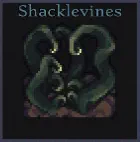
Shacklevines
+1 Rooted Duration
Longer rooted windows mean more time for the swarm to keep enemies pinned and fed into the damage-over-time engine.
Disarming Slip
+1 Disarmed on Dodge
This is an excellent fit for a dodge-heavy build because your defense starts applying pressure every time an enemy misses.
Concentration
If you stand still safely, respawn times accelerate by up to 25%.
This is best when you are sieging a rooted boss or holding a stable position. Do not force it if the battlefield is too dangerous to stand your ground.
Tune Burn and Plague for faster ticking
These items let you adjust how fast your damage-over-time effects actually do their work.
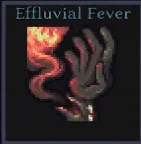
Effluvial Fever
Increases Burn Tick Speed by +0.75% but reduces Duration.
Smoldering Coal
Increases Burn Duration by +25%.
Together, these help offset each other. The result is a burn package that ticks quickly and stays active longer.
Virulence
Increases Plague Tick Speed by 10% with a minor duration penalty.
This is especially valuable because Dirty Blade scales so hard with frequent ticks and spreading. Faster ticks mean more spread pressure.
Finish with the best snowball pieces
These are strong once the swarm is already functioning.
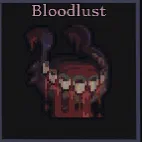
Bloodlust and Flickering Dagger
Both grant Frenzy, which gives +10% Attack Rate and +5% Movement Speed per stack.
This is a classic snowball pair. Bloodlust rewards kills, while Flickering Dagger is especially effective in a dodge-heavy swarm because the unit count and combat volume keep the effect rolling.
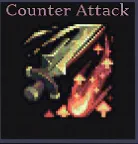
Counter Attack
Gain a stack of Power on dodge, increasing unit damage by 10% per stack.
This bridges defense and offense. It is not the first thing to chase, but it becomes nasty once dodge is high enough to trigger constantly.
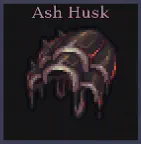
Ash Husk
Provides a +0.02 Damage Multiplier if the target has any stacks of Burn.
Since Burn is already part of the core package, this functions like a near-constant damage boost.
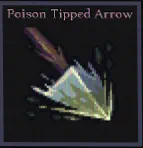
Poison Tipped Arrow
Ranged units deal Plague on hit to enemies not already afflicted.
This helps start infections immediately, especially in fights where the front line has not fully closed yet.
Mercy Kill
Plague damage is reduced by 25%, but incoming hits have Crit Chance Scaling multiplied by 2% per stack of Plague.
This is a tradeoff item worth considering when crit is the bottleneck. It sacrifices some plague damage to make the rest of the engine fire more often.
Bed Rest
Plague damage is reduced by 50%, but enemies deal 1% less damage per stack of Plague.
This is the defensive version of the plague package. If the swarm is still too fragile, this can noticeably reduce incoming damage.
Desert Winds
On crit, spawns a Fire Tornado. Limit 10.
This is a strong fit for a crit-heavy setup. The tornadoes add more Burn pressure and help keep status coverage high.
Use luck and loot tools to finish the run
Vulture
Automatically devours nearby corpses for a chance at extra loot.
This is excellent for The Many because the build naturally creates a high volume of deaths. More deaths mean more passive loot value.
Rabbit’s Foot
Luck +2.
This is a cleaner upgrade than Clover once you are ready to push the item pool harder. More Luck helps find the scaling pieces the build depends on.
Turn deaths into income
The economy package is what makes the build feel unfair once it starts snowballing.
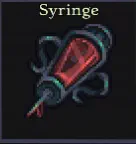
Syringe and Coin Pouch
These provide base multipliers for Corpuscles and Ducats.
Inquisitor’s Bounty
+12% Ducats / +3% Threat
The extra Threat is not a downside here. More attacks against your units means more dodges, more procs, and more chances to cash in on death-based effects.
Professional Training
+12% Ducats / +0.1% Respawn Time
This is one of the strongest money pieces for the build. The respawn penalty is small, especially if Broken Clock is already helping.
Charon’s Obol and Charon’s Tongue
These drop a Ducat and a Corpuscle every time a friendly unit dies.
This is where the swarm becomes profitable. Frequent deaths stop being a loss and start feeding your shop economy and skill progression.
Blood Bond
Normally dangerous on paper, but it works here by keeping units fragile enough to die often.
The loop is straightforward:
- Blood Bond keeps the swarm low.
- Units die frequently from pressure or the drain.
- Charon items convert those deaths into resources.
- Economy multipliers amplify the payout.
- Respawn tools bring the units back quickly.
- The loop repeats until the run is funded almost entirely by your own army.
Build reference screenshots


Common mistakes
Chasing armor and health too early
The biggest mistake is trying to “fix” The Many with bulk stats. Low-tier units do not become true tanks from small health or armor gains. The build is much stronger when it leans into dodge and respawn instead.
Taking The Clock over Broken Clock
This one is easy to get wrong. The flat respawn increase on The Clock hurts The Many far more than the small multiplier reduction helps. Broken Clock is the better fit.
Ignoring crit scaling after the first few picks
Crit is not optional. It powers Dirty Blade, Glowing Brand, Carrion Strike, Stunning Blow, and several of the strongest utility loops. If crit scaling falls behind, the whole build slows down.
Treating attack rate as the main win condition
Attack rate matters, but only after the core layers are online. The Many wins because each hit does more work through procs, not because the units swing for big direct damage.
Overvaluing trap stats
Health and armor are the most common traps for this build. If a choice improves dodge scaling, crit scaling, respawn speed, or status consistency, it is usually the better long-term pick.
Standing still when the fight is not safe
Concentration is powerful only when the battlefield is under control. Do not tunnel on the bonus if it puts the swarm in danger.
Forgetting that economy is part of the build
The Many is not just a combat setup. It is also a resource engine. If the run is not generating enough Ducats and Corpuscles to keep the item hunt moving, the build will stall before it reaches its strongest point.
Final priority order
If the shop offers several good options at once, I would generally value them like this:
- Dodge scaling
- Crit scaling
- Respawn speed
- Luck and rerolls
- Status effects that trigger on crit or on hit
- Economy multipliers
- Secondary damage or utility buffs
That order keeps the swarm alive, keeps the board full, and gets the damage engine running as early as possible. For The Many, that is the difference between a fragile horde and a swarm supreme.